

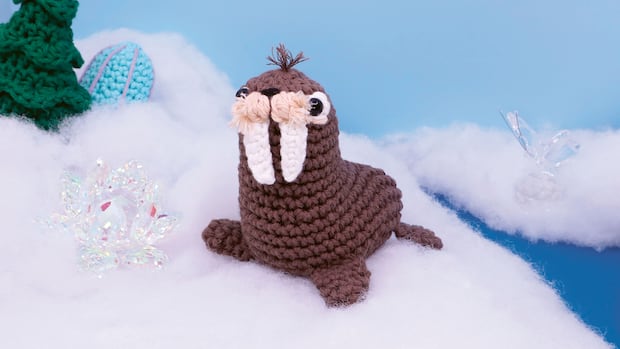

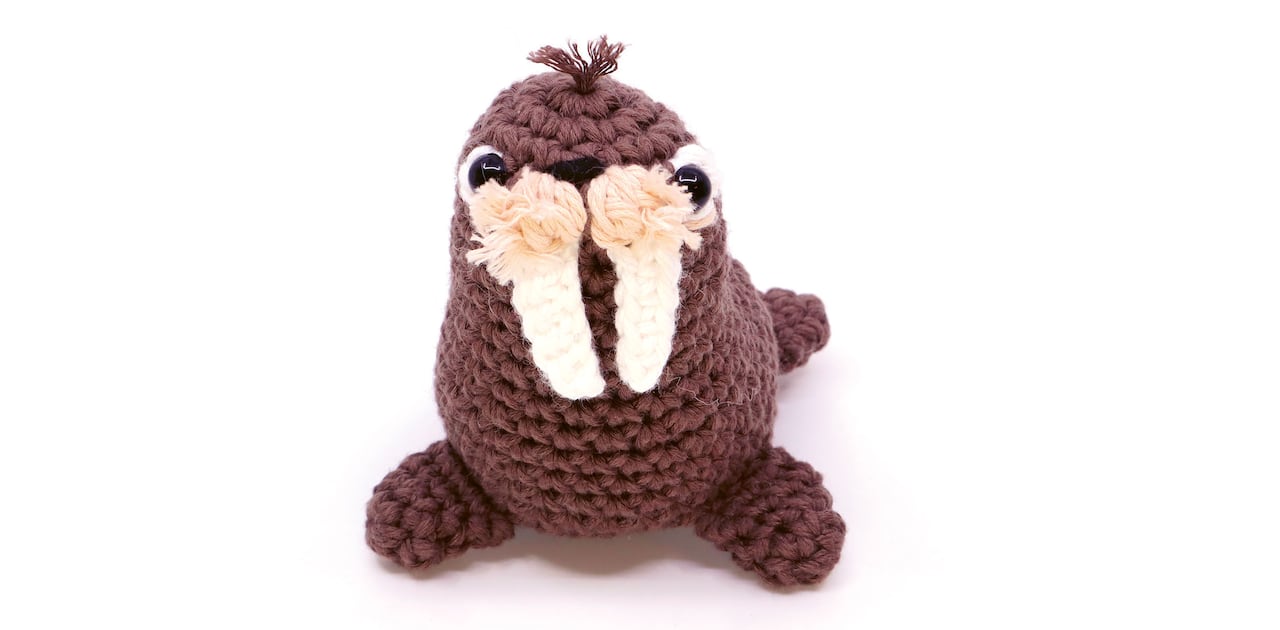
A five-inch walrus conveys a heartfelt message more than anything else can. The crochet pattern by designer Louie Mensinger simplifies the creation of Barnaby, despite his elaborate features. This project is featured in Mensinger’s latest book, Crochet Goomis, which showcases patterns for whimsical beings that dwell in the fictional realm of Goomia. Mensinger notes, “Every pattern was designed not only to breathe life into my creativity but also to introduce new techniques with each creation.” In this book, Barnaby spends his evenings crafting ice sculptures from drifting icebergs using his tusks.
The four fins of Barnaby are attached to his body as you crochet, making the design almost entirely seamless. His tired expression is enhanced by embroidered under-eye bags, yarn whiskers that appear frayed, and small tusks. Continue reading for complete instructions.
The following has been reprinted, with permission, from Crochet Goomis.
Barnaby the Walrus
By Louie Mensinger
As you arrive at the Frilly Frost Fjords, you will encounter an array of stunning ice sculptures etched into the floating icebergs. These masterpieces are crafted by a talented local artist named Barnaby, a walrus who creates these stunning works under the moonlight with his tusks. This spectacle has become a true marvel, attracting numerous tourists eager to see these creations before they vanish in the spring melt.
Louie’s Insights: This design features a variety of techniques, all aimed at making a character that might seem complex surprisingly simple to crochet! With the bobble stitch muzzles, body shaping, and an almost no-sew approach, this walrus truly offers a delightful and easy crafting experience.
Materials
Worsted (aran) weight yarn in the following colors:
- Brown [B] (body)
- Jute [J] (muzzle)
- Black [BK] (nose)
- White [W] (eyes)
Hook: size G/6 (4mm)
Safety eyes: 8mm x 2
Stuffing
Darning needle
Black thread or yarn (for embroidery)
Size
Approximately 5in (12.7cm) tall
Special Stitches and Abbreviations
bump = 2-dc bobble
bo = classic bobble stitch (4 repeat bobble)
sbo = spiked bobble (see Abbreviations and Specialty Stitches)
Pattern:
Fin (make 4)
Using Brown, create a magic loop.
Rnd 1: sc 6 into the magic loop (6)
Rnd 2: sc 5, inc 1 (7)
Rnd 3: sc 6, inc 1 (8)
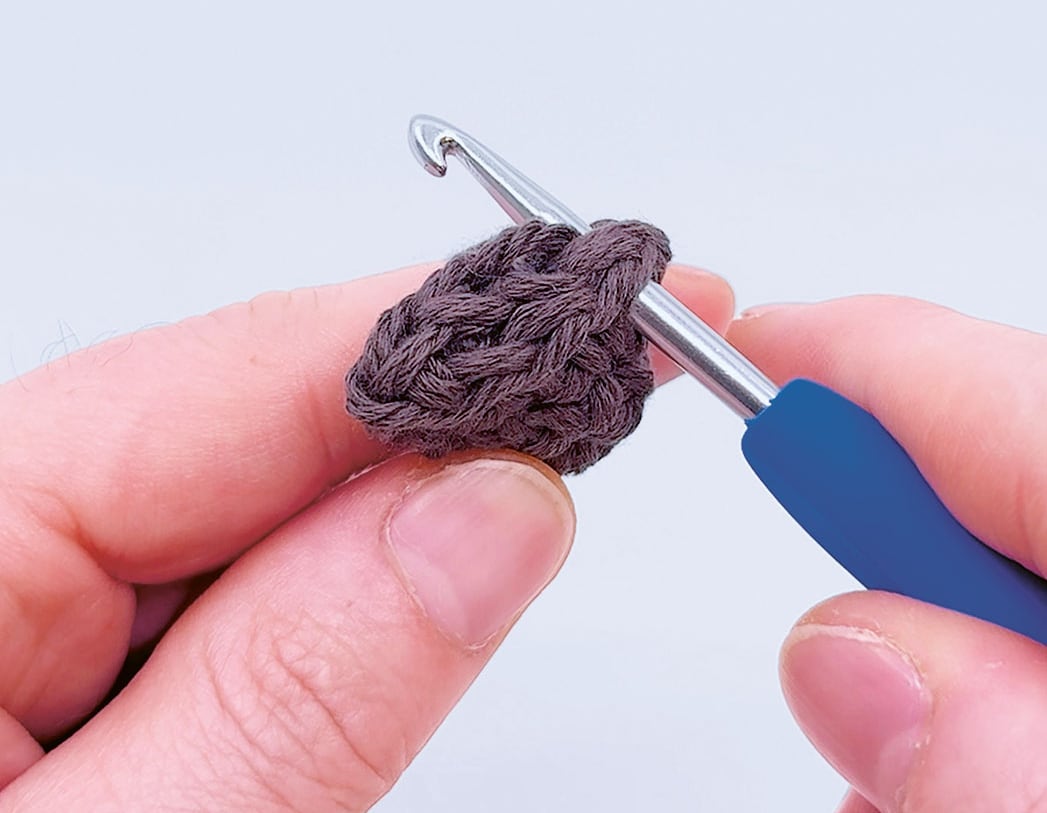
Rnd 4: sc 3,
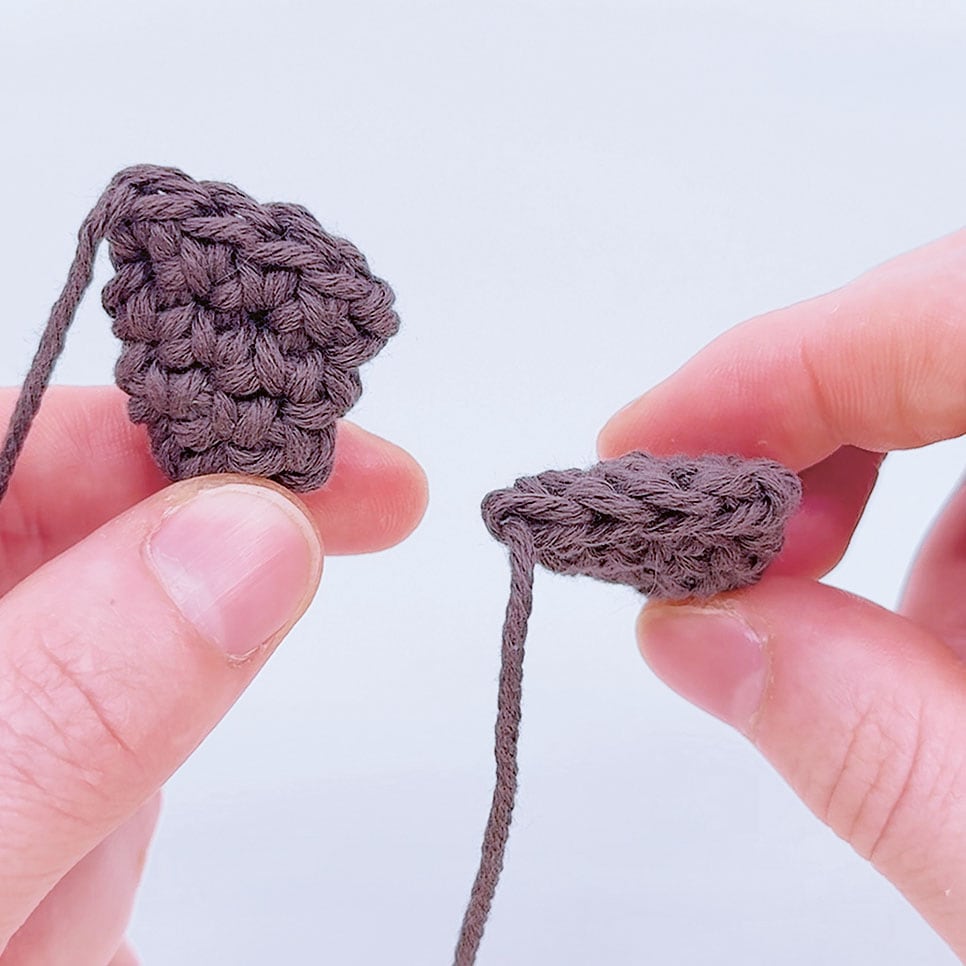
Fold the fin in half to align the stitches and pull the working yarn to the front.
Working through both layers, sc 4 across to close.
Cut the yarn and pull the tail through. Set aside until Rnd 18 of the body.
(Louie Mensinger)
(Louie Mensinger)
Tusk (make 2)
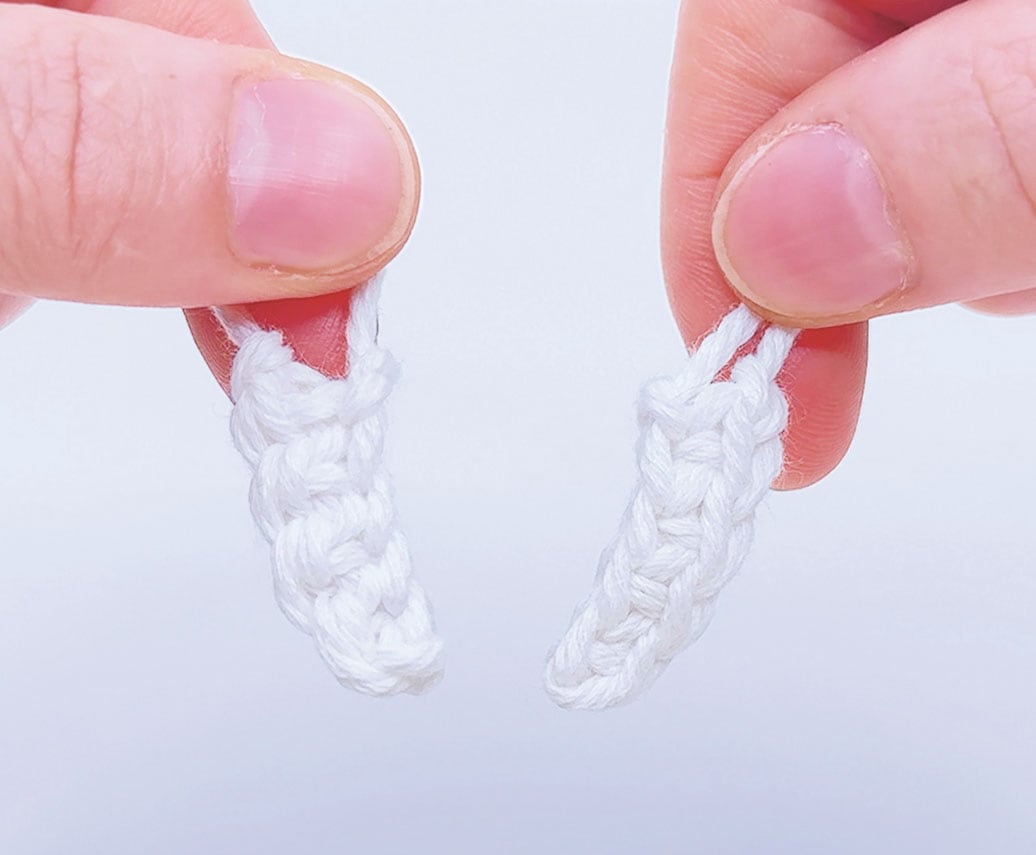
Using White, ch 5.
Row 1: skip the first ch, and sc in each ch along (4)
Ch 1, cut the yarn and pull through to make a knot. Pinch the end to form a sharper point and set aside to sew one under each jowl after adding the face.
(Louie Mensinger)
Body
Using Brown, create a magic loop.
Rnd 1: sc 6 into the magic loop (6)
Rnd 2: inc in each st (12)
Rnd 3: [sc 1, inc 1] 6 times (18)
In Rnd 4, you will change colors to create the eyes and jowls.
Be mindful of the color changes indicated in [brackets] for when to switch colors.
Rnd 4: [B] sc 5, inc 1, sc 2, [W] bump 1, [B] sc 1, [J] bo 1, [B] sc 1, [J] bo 1, [B] sc 1, [W] bump 1, [all B from here on] sc 2, inc 1 (20)
Rnds 5–9: sc in each st (20 for 5 Rnds)
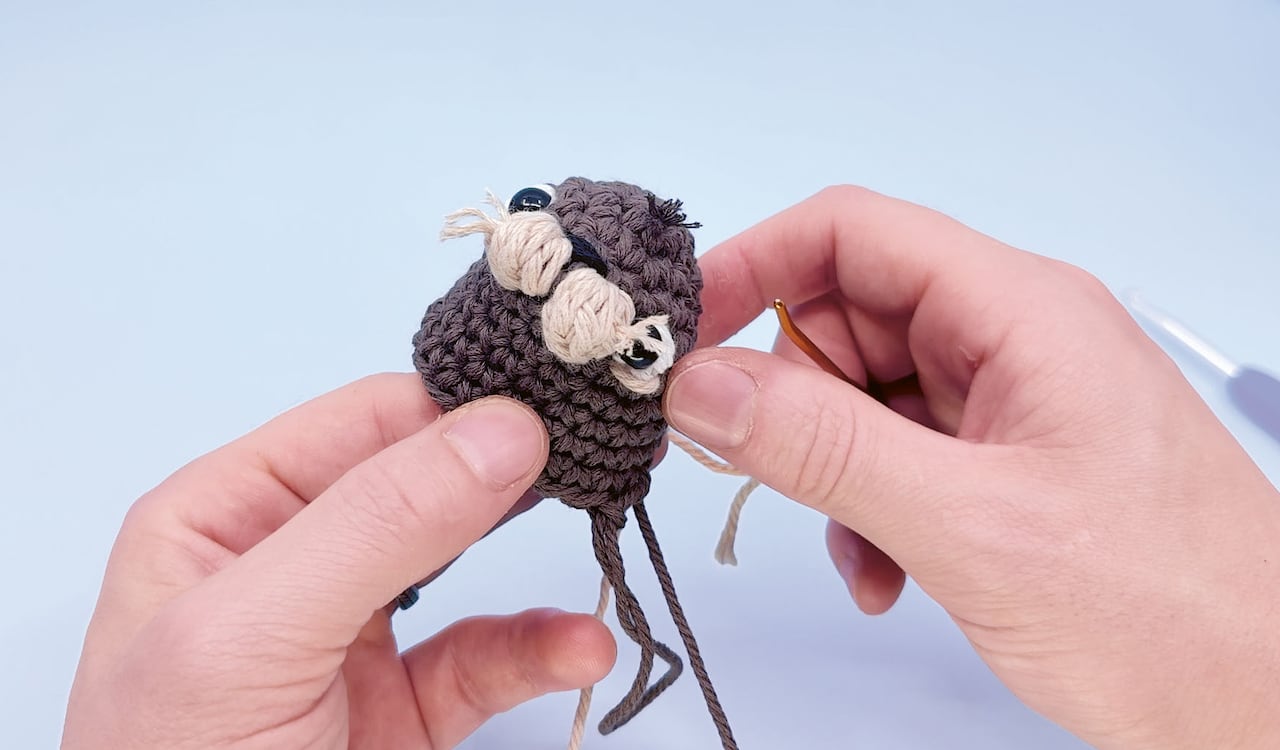
Adding the Face
Embroider a nose above the jowls (bobbles from Rnd 4) using Black yarn.
Insert the safety eyes into the White bump stitches from Rnd 4.
After placing the eyes and nose, use Jute yarn to embroider bags under the eyes.
Using a needle, pull the tails of Jute from the jowls through the sides of the bobble stitches. Trim and create the whiskers by adding 3 on each side. Additional whiskers can be made with another strand of Jute yarn tied in a double knot to prevent them from pulling out. Consider fraying the ends by untwisting the whiskers.
Attach the tusks to the face by threading the tail ends of each tusk through the stitches on either side of the jowls (bobble stitches from Rnd 4). Ensure each tusk is angled toward the belly before double knotting the tail ends and concealing them within the head.
(Louie Mensinger)
Body Continued
Rnd 10: sc 4, inc 1, sc 15 (21)
Rnd 11: sc in each st (21)
Rnd 12: sc 4, inc 1, ch 4, starting in the second ch, sc 3, working into the body sts, inc 1, sc 7, inc 1, sc 4, inc 1, sc 2 (28)
Rnd 13: sc 6, working up the chs made in Rnd 12, sc 2, inc 1, working into sts, inc 1, sc 2, skip 1, sc 18 (32)
Rnd 14: sc 8, inc 1, sc 2, inc 1, sc 20 (34)
Rnd 15: sc 9, inc 1, sc 4, inc 1, sc 19 (36)
Rnd 16: sc in each st (36)
Rnd 17: sc 25, stop early marking a new end of the Rnd (36)
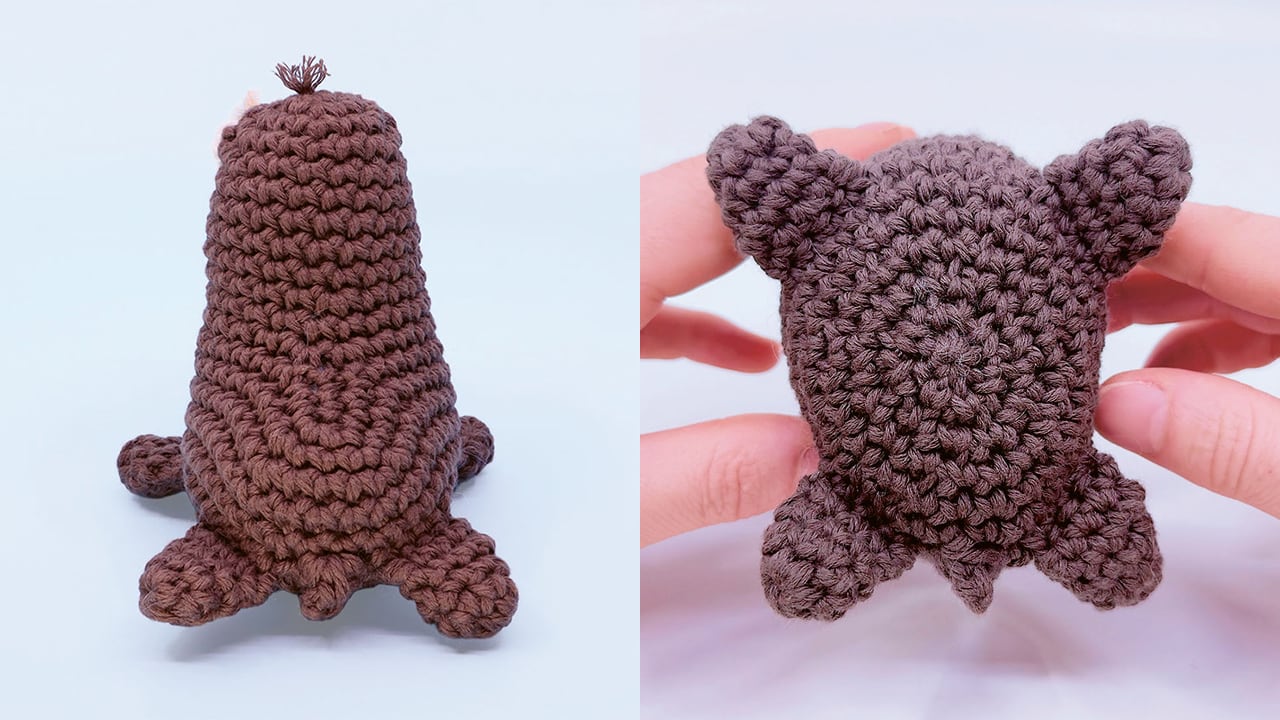
Align one fin with the row being worked on the body, angled back.
Rnd 18: working into both loops of the fin and the sts along the body simultaneously sc 4, working into the body, sc 5.
Take the second fin and, working into both loops of the angled back fin and the sts along the body simultaneously, sc 4, working into the body, sc 6.
Take the third fin and, working into both loops of the angled forward fin and the sts along the body simultaneously sc 4.
Working into the body, sc 1, sbo 1, sc 1.
Take the fourth fin and, working into both loops of the angled forward fin and the sts along the body simultaneously, sc 4, working into the body, sc 6 (36)
Rnd 19: [sc 4, invdec 1] 6 times (30)
Rnd 20: [sc 3, invdec 1] 6 times (24)
Rnd 21: [sc 2, invdec 1] 6 times (18)
Rnd 22: [sc 1, invdec 1] 6 times (12)
Partially fill.
Rnd 23: invdec in each st (6)
Cut the yarn and pull through.
Stuff completely and sew closed.
Regularly feed with fresh salmon, penguins, or tangled WIPs, and enjoy your new Walrus!
(Louie Mensinger)
(Louie Mensinger)
Excerpted from Crochet Goomis by Louie’s Loops. Copyright © 2026 Louie Mensinger. Photography by Louie Mensinger. Published by Quadrille. Reproduced by arrangement with the publisher. All rights reserved.